
The Ultimate Guide to Perfect, Flaky Laccha Paratha
FOOD
Aparna
7/17/20253 min read

The Ultimate Guide to Perfect, Flaky Laccha Paratha
Published on: Aparna Insights
Hello, wonderful foodies!
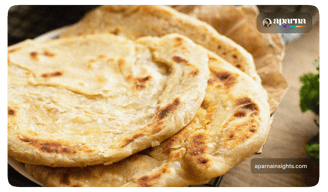
Today, I’m thrilled to share a recipe for one of my all-time favorites: the incredible Laccha Paratha. This is a classic North Indian flatbread famous for its countless crispy, flaky layers. Once you start eating one, it’s impossible to stop—the texture is just that addictive!
Making Laccha Paratha is surprisingly simple, but the magic lies in the technique. From kneading the dough to the final, satisfying crush that reveals all those beautiful layers, every step is important. I’ve perfected these techniques to ensure you get a flawless, restaurant-style paratha every single time.
So, follow along closely, and let's create these delicious, layered masterpieces together.
Ingredients
All-Purpose Flour (Maida): 1 cup
Salt: To taste
Sugar: 1 tsp
Semolina (Bombay Rava): 2 tsps
Water: As needed, for a semi-soft dough
Oil: 1.5 tbsp
Ghee (Solidified/Semi-Solid): 1 tbsp per paratha, for layering
Ghee (Melted) or Oil: For cooking
Dry Flour: For dusting
Instructions
Step 1: Preparing the Dough
In a large mixing bowl, combine the all-purpose flour (maida), salt, sugar, and semolina. Mix the dry ingredients well.
Gradually add water and begin to knead the dough. The goal is a semi-soft dough—it should not be hard like puri dough.
Knead for a long time. This is crucial. Knead the dough for at least 5-7 minutes. The more you knead, the more elastic the dough becomes, which is essential for rolling it thin and creating layers.
Add 1.5 tablespoons of oil and knead again for another 3-4 minutes until the dough is smooth and pliable.
Divide the dough into equal-sized balls.
Grease the balls with a little oil, cover them with a damp cloth, and let them rest for 30 minutes. This resting period is vital for the gluten to relax, making the dough easier to work with.
Step 2: Creating the Layers (The "Laccha" Technique)
After 30 minutes, take one rested dough ball. Dust your work surface with a little dry flour.
Roll the dough ball out as thinly as you possibly can. The thinner you roll, the more layers you will get.
Take 1 tablespoon of solidified ghee and spread it evenly all over the rolled-out dough. Using solidified (or semi-solid) ghee instead of melted ghee or oil is the secret to creating distinct, flaky layers.
Sprinkle a light layer of dry flour over the ghee.
Using a knife, cut the dough into very thin, closely-packed strips from one end to the other.
Carefully gather all the strips together, gently scraping and folding them over each other to form a long, layered rope.
Sprinkle a little more dry flour on top.
Gently roll this rope into a tight coil, like a snail shell. Tuck the final end securely underneath the coil. You have now created your layered paratha ball!
Step 3: Rolling and Cooking the Paratha
Take the coiled dough ball and gently press it flat with your palm.
Dust with a little flour and roll it out to the thickness of a regular chapati or roti. Be careful not to roll it too thin, as this can cause the layers to merge.
Heat a tawa or griddle until it is very hot. A hot tawa is key to a crispy paratha.
Place the paratha on the hot tawa. First, cook it on both sides without any oil or ghee until light brown spots appear.
Now, apply about 1 teaspoon of ghee or oil to the top surface. Flip the paratha, apply ghee to the other side, and cook until both sides are a beautiful golden brown and crispy. Use a spatula to press down gently on the paratha as it cooks to ensure it cooks evenly.
Step 4: The Final, Magical Touch
This is the most important step! As soon as you take the hot paratha off the tawa, place it on a clean surface.
Using both hands, gently crush or clap the paratha from the sides, pushing inwards. This will instantly release all the beautiful, flaky layers. This must be done while the paratha is still hot.
Serve these incredible Laccha Parathas immediately with your favorite paneer curry, dal makhani, or any rich non-vegetarian gravy. The crispy, flaky texture is simply irresistible!
Key Tips for Perfect Laccha Parathas
Kneading is Everything: Don't skip the long kneading process. It's what makes the dough strong and elastic enough to be rolled thin without tearing.
Solidified Ghee: This is non-negotiable for the best layers. Melted ghee or oil will be absorbed by the dough, and you won't get that flaky separation.
The "Crush": Always crush the paratha while it's hot. If it cools down, the layers will set and won't separate as easily.
Maida vs. Wheat Flour: While this recipe works best with maida for that classic crispy texture, you can make it with wheat flour too. However, wheat flour parathas will be softer and less crispy.
I hope you try this recipe and enjoy the most perfect, flaky parathas you've ever made.
With love,
Aparna @ Aparna Insights